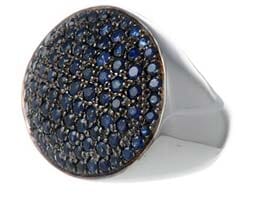
Spin your products in gorgeous 360° rotation.
Installation
If you're using one of these platforms, click your platform and follow the instructions to install the Magic 360 module:
If you're not using one of the platforms above, install Magic 360 like so:
Quick install:
- Download the Magic 360 demo (zip).
- Unzip the file on your computer and FTP the magic360 folder to your website directory (on your server), keeping the file and folder structure intact.
- Use the wizard to create the HTML for your spin.
- Copy and paste the HTML into your page.
Detailed install:
- Download the Magic 360 demo (zip).
- Unzip the file on your computer and FTP the magic360 folder to your website directory (on your server), keeping the file and folder structure intact.
Reference the magic360.js and magic360.css files before your </head> tag.
<link rel="stylesheet" href="magic360/magic360.css">
<script src="magic360/magic360.js"></script>
(If you cannot access the head section of your page, reference the files elsewhere such as the main content of your page.)
- Insert an <img> tag for the first image in your spin. Wrap an <a> tag around it with a class of Magic360 and href of #.
- Specify the format of your file names using the filename parameter inside a data-options tag (this is described in detail below). A basic HTML page could look like this:
<html>
<head>
<title>Magic 360 example</title>
<link href="magic360/magic360.css" rel="stylesheet">
<script src="magic360/magic360.js"></script>
</head>
<body>
<a class="Magic360" data-options="filename: imagename-{col}.jpg;"><img src="imagename-01.jpg"></a>
</body>
</html>
<a class="Magic360" data-options="filename: imagename-{col}.jpg;"><img src="imagename-01.jpg"></a>
Naming your images
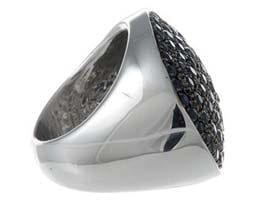
Your images should have filenames which identify the sequence using numbers starting at 01. For example, a 36 image spin might have filenames like this:
- ring-01.jpg
- ring-02.jpg
- ring-03.jpg
- etc...
- ring-34.jpg
- ring-35.jpg
- ring-36.jpg
Numbers can be anywhere in the filename, with or without hyphens. They must always use 2 or more digits i.e. 01, 02, 03, not a single digit like 1, 2, 3. If you need to rename many files, a quick method is to use this free File Renamer program.

A multiple-row spin, which can rotate images up/down as well as left/right, should have a numbered sequence for the row and the column. For example, a spin with 12 columns and 3 rows might have filenames like this:
|
|
|
The first two digits is the row and the second two digits is the column. These will be referenced using {col} and {row} for example: ring-{row}-{col}.jpg.
Referencing images
Your images will be referenced using {col} to denote the image column number and {row} if your spin has multiple rows (for up/down spins).
1. Create an <img> tag for the first image you want to show. (You can choose an image other than number 01 if you like - see how to choose the first image). For example:<img src="ring-01.jpg">2. Surround the <img> with an <a> link and use the filename parameter to denote the names of your images, inserting {col} or {row} in place of the numbers. For example:
<a class="Magic360" data-options="filename:ring-{col}.jpg;"><img src="ring-01.jpg"></a>
3. If your spin has 36 images in 1 row, then you are all done as those are the default values. If you have a different number, you should specify the number of columns and rows that make up your spin. The example below is for a spin with 12 columns and 3 rows (36 images in total):
<a class="Magic360" data-options="filename:ring-{row}-{col}.jpg; rows:3; columns:12;"><img src="ring-01-01.jpg"></a>
4. Alternatively, you can name your image files whatever you like and reference every one of them explicitly using the parameters images and large-images like so:<a class="Magic360" data-options="images: image/path/image-1.jpg image/path/image-2.jpg ... image/path/image-n.jpg image/path/image-36.jpg; large-images: image/path/large-image-1.jpg image/path/large-image-2.jpg ... image/path/large-image-n.jpg image/path/large-image-x.jpg;"><img src="image/path/image-r.jpg"></a>
The large-images parameter is optional. If you have large images, your spin can be magnified on click and also viewed in full-screen. The images can have any filenames you wish, just reference each one of them like in the example above.
Magnifier
If you have specified large images (see below), your spin will automatically magnify an image on click. The large image will download on demand and a spinning loading icon will show briefly.
The whole area of the image will be magnified, or you can choose a smaller magnifier as a circle or square. This is a circular magnifier:
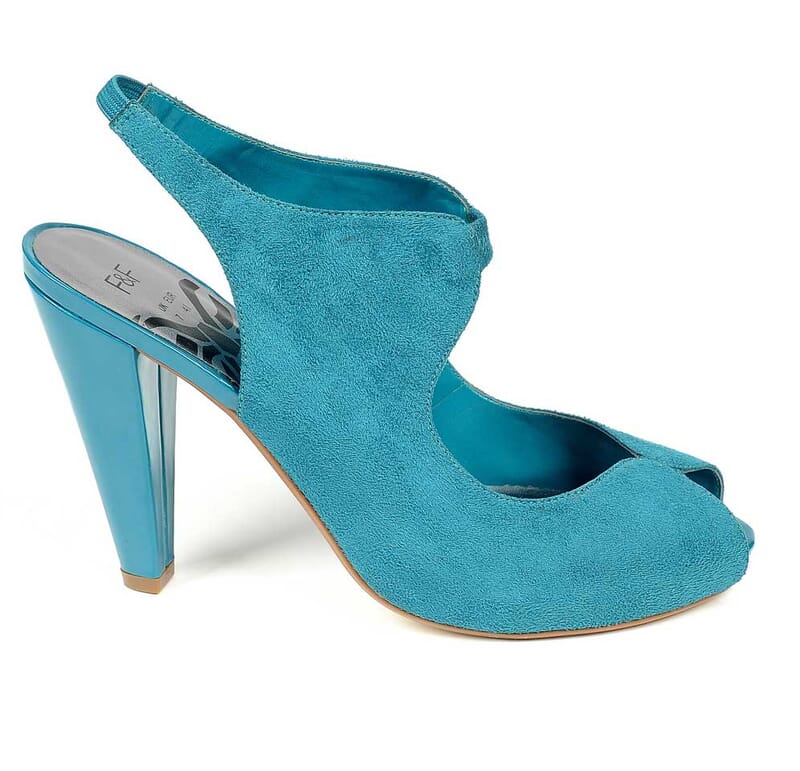
<a href="shoe-big-01.jpg" class="Magic360" data-options="filename:shoe-{col}.jpg; large-filename: shoe-big-{col}.jpg; magnify:true; magnifier-shape:circle;"><img src="shoe-01.jpg"></a>
The magnifying glass is 80% of the image width. You can adjust this percentage, for example:
<a href="shoe-big-01.jpg" class="Magic360" data-options="filename:shoe-{col}.jpg; large-filename: shoe-big-{col}.jpg; magnify:true; magnifier-shape:circle; magnifier-width:100%;"><img src="shoe-01.jpg"></a>
Alternatively, you can specify a width in pixels instead of percentage, for example magnifier-width:250px.
The magnifier can be turned off like so:
<a href="shoe-big-01.jpg" class="Magic360" data-options="filename:shoe-{col}.jpg; large-filename: shoe-big-{col}.jpg; magnify:false;"><img src="shoe-01.jpg"></a>
Full-screen
If you have a large set of images (e.g. small 260px JPEG, large 800px JPEG), the full-screen button in the top right will be enabled when you reference the images like so:
- Specify the large image location in the href.
- Specify the structure of your file names with the large-filename parameter.
For example, the code will look something like this:
<a href="shoe-big-01.jpg" class="Magic360" data-options="filename:shoe-{col}.jpg; large-filename: shoe-big-{col}.jpg;"><img src="shoe-01.jpg"></a>
The large images will only load if the user clicks the full-screen button. The large images typically take a few seconds to download.
You can disable full-screen by either undoing steps 1 & 2 above or by setting fullscreen: false.
Full-screen magnifier
If the large images are larger than the users screen can display, the images will be reduced to fit the screen and will be magnifiable on click. This can be used to show a more detailed view, though bear in mind that very large images (typically above 900px height) can take a long time to download.
The magnifier feature is automatically available when image size allows.
This example (which uses lazy loading) has 24 frames of 149px by 300px images and a full screen view of 860px by 1764px images. Providing your screen is less than 1764px, you will notice that the full-screen image can be clicked to zoom in. Try it:
Multiple rows
To create a 3D spin that rotates up/down as well as left/right, the product should be photographed in different vertical positions (rows). In the data-options tag, specify the number of rows and columns in your spin.
This example has 4 rows with 12 columns per row (48 photos in total):
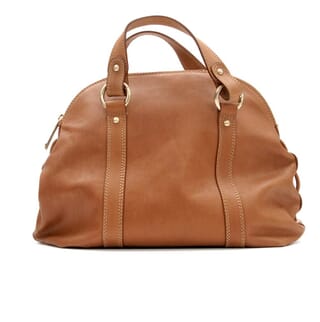
<a class="Magic360" data-options="filename:ring-{row}-{col}.jpg; rows:4; columns:12;"><img src="bag-01-01.jpg"></a>
To add a magnifier, link the href to the large image, specify the filename structure using the large-filename parameter and set the magnify parameter to true. For example:
<a href="bag-big-01-01.jpg" class="Magic360" data-options="filename:bag-{row}-{col}.jpg; large-filename: bag-big-{row}-{col}.jpg; magnifier:true; columns:12; rows:4;"><img src="bag-01-01.jpg"></a>

Hint
A "hint" message helps to show that the image can be spun around. It will disappear on click (or on hover if you have set the spin method to hover). It won't be shown if you set your spin to rotate infinitely.
You can change the text by using Magic360Lang and setting hint-text (for computers) and mobile-hint-text (for mobile devices). For example:
<script>
var Magic360Lang = {
'hint-text': 'Drag',
'mobile-hint-text': 'Spin'
};
</script>
You can turn the hint off by setting hint:false like so:
<a class="Magic360" data-options="filename:ring-{col}.jpg; hint:false;"><img src="ring-01.jpg"></a>
Spin movement
Customize your auto-spin, the direction you want to show your 360 spins, how to reverse rotate a spin if your products were photographed in reverse order, the speed the spin rotates while dragging, choose to move the spin on hover, or disable smoothing.
Auto-spin
Draw attention to your spin by making it to spin automatically. By default, it will spin once on page load.
You can set it to spin on hover or on click or any combination. For example, to make it spin on page load and again on hover, use the autospin-start parameter like so:
<a class="Magic360" data-options="filename:ring-{col}.jpg; autospin-start:load,hover;"><img src="ring-01.jpg"></a>
You can set the autospin parameter to spin twice on page load like so:
<a class="Magic360" data-options="filename:ring-{col}.jpg; autospin:twice;"><img src="ring-01.jpg"></a>
Or set it to spin infinitely like so:
<a class="Magic360" data-options="filename:ring-{col}.jpg; autospin:infinite;"><img src="ring-01.jpg"></a>
An infinite autospin will stop upon click. You can prevent user intervention to make it spin forever, like so:
<a class="Magic360" data-options="filename:ring-{col}.jpg; autospin:infinite; autospin-stop:never;"><img src="ring-01.jpg"></a>
Turn off autospin completely like so:
<a class="Magic360" data-options="filename:ring-{col}.jpg; autospin:off;"><img src="ring-01.jpg"></a>
The autospin will automatically start with the row / column specified in the src. In the unlikely event that you want to start the autospin from a different image, you can specify another row and column by using the start-row and start-column parameters, like so:
<a class="Magic360" data-options="filename:ring-{col}.jpg; columns:12; rows:4; start-column:6; start-row:3"><img src="bag-01-01.jpg"></a>
Make the auto-spin faster or slower by changing the autospin-speed parameter. By default, one full rotation will take 3.6 seconds. Set a new time in milliseconds, for example 2000ms:
<a class="Magic360" data-options="filename:ring-{col}.jpg; autospin-speed:2000; autospin:infinite;"><img src="ring-01.jpg"></a>
If autospin-speed isn't explicitly defined, then it is automatically determined according to the following rules:
- If number of columns * 0.15 sec < 3.6 sec -> autospin-speed = number of columns * 0.15 sec
- If number of columns * 0.15 sec ≥ 3.6 sec -> autospin-speed = 3.6 sec
For example:
- 12 column spin = 1.8 seconds
- 18 column spin = 2.7 seconds
- 24 column spin = 3.6 seconds
- 36 column spin = 3.6 seconds
- 72 column spin = 3.6 seconds
Direction
The image will rotate clockwise by default. You can make it rotate anti-clockwise like so:
<a class="Magic360" data-options="filename:ring-{col}.jpg; autospin-direction:anticlockwise;"><img src="ring-01.jpg"></a>
For showing an animation that doesn't rotate in 360 degrees, its useful to use the 'alternate-clockwise' or 'alternate-aniticlockwise' to play the spin back and forth.
<a class="Magic360" data-options="filename:ipad-cover-{col}.jpg; autospin-infinite; autospin-direction:alternate-clockwise;"><img src="ipad-cover-92.jpg"></a>

Reverse rotation
If your photos were taken in reverse order (anticlockwise), simply apply the opposite direction with reverse-column and/or reverse-row:
<a class="Magic360" data-options="filename: ring-{col}.jpg; reverse-column: true;"><img src="ring-01.jpg"></a>
Speed
You can change the speed of rotation while dragging. The default is 50. Make it spin faster by increasing the number (maximum 100) or slow it down by decreasing the number (minimum 1). For example:
<a class="Magic360" data-options="filename:ring-{col}.jpg; speed:80;"><img src="ring-01.jpg"></a>
Spin on hover
The image will spin on drag by default. You can also set it to spin on hover. On touch-screen devices (iPhone, iPad etc), it will always spin on drag (without a cursor, there is no such thing as hover).
To spin the image on hover, set the spin parameter to hover like so:
<a class="Magic360" data-options="filename:ring-{col}.jpg; spin:hover;"><img src="ring-01.jpg"></a>
Smoothing
Smoothing will gradually slow down the image when you stop spinning it. You can remove smoothing by setting the smoothing parameter to false. For example:
<a class="Magic360" data-options="filename:ring-{col}.jpg; smoothing:false;"><img src="ring-01.jpg"></a>
Change first image
You can choose any image as the first one displayed in your spin. Specify your chosen image in the <img src="">. For example:
Start at column 16:
<a class="Magic360" data-options="filename:ring-{col}.jpg;"><img src="ring-16.jpg"></a>
Start at column 1:
<a class="Magic360" data-options="filename:ring-{col}.jpg;"><img src="ring-01.jpg"></a>
Initialization
The images in your spin will download automatically once the DOM is ready (i.e. once the rest of the page has downloaded). The first image to download is the main image declared in the <img>, then the other images will be fetched while the loading progress indicator is shown.
This provides the best/fastest user experience but uses the largest data transfer on your server. You can reduce data transfer by changing the initialize-on parameter to download the images on hover or click. For example:
<a class="Magic360" data-options="filename:ring-{col}.jpg; initialize-on:hover;"><img src="ring-01.jpg"></a>
Magnified images always download on demand if/when the user clicks to zoom in. They don't download on DOM ready (to save on data transfer).
Mousewheel spin
Spin on mousewheel will rotate the image by 3 frames. You can change the increment to more or less frames using mousewheel-step, for example 1 frame:
<a class="Magic360" data-options="filename: ring-{col}.jpg; mousewheel-step: 1;"><img src="ring-01.jpg"></a>
Turn off the spin on mousewheel like below:
<a class="Magic360" data-options="filename:ring-{col}.jpg; mousewheel-step: 0;"><img src="ring-01.jpg"></a>
Increment
If you want your spin to load faster, you can skip loading some images. The column-increment parameter can be set to load every other image or every third image.
For example, if you have a set of 36 images, you can load just these 18 images:
- 01, 03, 05, 07, 09, 11, 13, 15, 17, 19, 21, 23, 25, 27, 29, 31, 33, 35
by setting the column-increment parameter like so:
<a class="Magic360" data-options="filename:ring-{col}.jpg; column-increment:2;"><img src="ring-01.jpg"></a>
Or you could load just 12 images:
- 01, 04, 07, 10, 13, 16, 19, 22, 25, 28, 31, 34
by setting the column-increment parameter to 3:
There is also a row-increment parameter in case your spin has multiple rows and you wish to skip some of them.
Lazy loading
Lazy loading can reduce the download time of your page by preventing images from downloading until the users scrolls to that part of the page. It's suitable if your pages are long and your 360 spins are placed further down your page (below the fold).
This spin uses lazy loading:
Lazy loading images do not have the SRC attribute, so the browser does not load them on page load. For example:
<a class="Magic360" data-options="filename:ring-{col}.jpg"><img class="lazy-image" data-src="ring-01.jpg"></a>
Instead, you can set the SRC on demand with JavaScript. Magic 360 waits for the SRC attribute on the and initialization begins once it is there. Here is some sample JavaScript you can use to set the SRC:
<script>
function isInViewport(el) {
    var rect = el.getBoundingClientRect();

    return (
        rect.top        >= 0
        && rect.left    >= 0
        && rect.top     <= (window.innerHeight || document.documentElement.clientHeight) ); } function lazyLoadImages() { var images = document.querySelectorAll ? document.querySelectorAll('img.lazy-image') : document.getElementsByClassName('lazy-image'), i=images.length-1, src; for ( ; i>=0; i-- ) {
        src = images[i].getAttribute('data-src');
        if ( src && !images[i].getAttribute('src')
            && isInViewport(images[i]) )
        {
            images[i].setAttribute('src', src);
            images[i].setAttribute('data-src', '');
        }
    }

}
if (window.addEventListener) {
    window.addEventListener('scroll', lazyLoadImages, false);
} else {
    window.attachEvent('onscroll', lazyLoadImages);
}
</script>
Right-click menu
The context menu (right click) on a spin is disabled by default. You can enable it with the right-click parameter:
<a class="Magic360" data-options="filename: ring-{col}.jpg; right-click: true;"><img src="ring-01.jpg"></a>
Cursor
Change the cursor shown over the image to any other cursor. The default cursors are:
To change to another cursor, open the magic360.css file and edit these styles:
.Magic360.zoom-in {
cursor: url(graphics/zoomin.cur), pointer;
}
.Magic360 .magnifier.inner {
cursor: url(graphics/zoomout.cur), pointer;
}
Combine with Magic Zoom Plus
Create an amazing user experience by combining Magic Zoom Plus with Magic 360. Alternate between 360 degree spin and zoom & enlarge effects for static images.
Before you begin, download this 360 icon image - 360icon.png (right click it and save it to your computer). You can use this image as your 360 thumbnail.
Download Magic Zoom Plus > Extract ZIP file > FTP the magiczoomplus folder to your website directory (on your server), keeping the file and folder structure intact.
You're now ready to update your file references before your </head> tag. For example:
<link rel="stylesheet" href="magic360/magic360.css">
<script src="magic360/magic360.js"></script>
<link rel="stylesheet" href="magiczoomplus/magiczoomplus.css">
<script src="magiczoomplus/magiczoomplus.js"></script>
Place the following code in the <body> tag of your web page:
<div id="zoom-box" style="display: none;"><a id="zoom" class="MagicZoom" href="large-image-1.jpg"><img src="small-image-1.jpg" alt=""></a></div>

<div id="spin-box"><a id="spin" class="Magic360" href="#" data-magic360-options="filename:spin-image-{col}.jpg;"><img src="spin-image-01.jpg" alt=""></a></div>

<div><a class="item-thumbnail" onclick="return switchZoom360Example(this);" ontouchstart="return switchZoom360Example(this);" data-zoom-id="zoom" href="large-image-1.jpg" data-image="small-image-1.jpg"><img src="thumb-image-1.jpg" alt=""></a> <a class="item-thumbnail" onclick="return switchZoom360Example(this);" ontouchstart="return switchZoom360Example(this);" data-zoom-id="zoom" href="large-image-2.jpg" data-image="small-image-2.jpg"><img src="thumb-image-2.jpg" alt=""></a> <a class="item-thumbnail" onclick="return switchZoom360Example(this);" ontouchstart="return switchZoom360Example(this);" data-zoom-id="spin" href="#"><img src="360icon.png" alt=""></a></div>
<script>
function switchZoom360Example(elm) {
	var zoom = elm.getAttribute('data-zoom-id')=='zoom';
	document.getElementById('zoom-box').style.display = (zoom)?'block':'none';
	document.getElementById('spin-box').style.display = (zoom)?'none':'block';
	return false;
}
</script>
Your spin & zoom effects will look like this:

API & callbacks
API methods
Use the Magic 360 API commands to change your images dynamically (AJAX):
- Magic360.start() - Start all spins.
- Magic360.start(id) - Start spin by #id.
- Magic360.stop() - Stop all spins.
- Magic360.stop(id) - Stop spin by #id.
- Magic360.spin(id/*, frames*/) - Spin image by +/-XX frames. If frames omitted, start infinite spin.
- Magic360.jump(id, rows) - Jump by +/-XX rows on a particular spin by #id.
- Magic360.magnifyOn(id) - Turn on Magnify mode on a particular spin by #id
- Magic360.magnifyOff(id) - Turn off Magnify mode on a particular spin by #id.
- Magic360.fullscreen(id) - Trigger full-screen mode on a particular spin by #id.
- Magic360.getCurrentFrame(id) - Retrieve current row & column of a particular spin by #id.
Some examples of how you could use the API:
In the examples, the bag has an id of spin-1. Here is the HTML for those 9 buttons:
<button onclick="Magic360.stop('spin-1');">Stop Magic 360</button>
<button onclick="Magic360.start('spin-1');">Start Magic 360</button>
<button onclick="Magic360.spin('spin-1');">Spin bag</button>
<button onclick="Magic360.pause('spin-1');">Pause spin</button>
<button onclick="Magic360.spin('spin-1', 1);">1 frame forward</button>
<button onclick="Magic360.spin('spin-1', -1);">1 frame backward</button>
<button onclick="Magic360.jump('spin-1', 1);">Jump to next row</button>
<button onclick="Magic360.jump('spin-1', -1);">Jump to previous row</button>
<button onclick="Magic360.magnifyOn('spin-1');">Turn on magnifier</button>
<button onclick="Magic360.magnifyOff('spin-1');">Turn off magnifier</button>
<button onclick="Magic360.fullscreen('spin-1');">Launch full-screen</button>
<button onclick="var frame = Magic360.getCurrentFrame('spin-1'); alert('Current frame details: row='+frame.row+', column='+frame.column);">Get current frame</button>
JavaScript callbacks
You can trigger events once all images have loaded by defining a function for the callback onready. It has all sorts of potential uses - you could allow a user to switch sets of 360 images on a page or you could show some text over a spin once it is ready to use.
The following example will display an alert "360 is ready":
var Magic360Options = {
'onready': function(spin) { alert('360 is ready'); }
};
Or you could trigger it like so:var Magic360Options = {
'onready': onMagic360Ready
};
function onMagic360Ready(spin){
alert('360 is ready');
}
In those examples, spin is the ID of the particular spin on your page with id="spin", allowing you to choose a particular spin if you have more than one on the page.
Callbacks can also be used for event logging - to give you statistics on how your viewers are interacting with your spins:
var Magic360Options = {
      'onspin': function(spin) { logEvents('Spin begins on a '+spin.id+' image'); },
      'onzoomin': function(spin) { logEvents(''+spin.id+' image is zoomed in'); },
      'onzoomout': function(spin) { logEvents(''+spin.id+' image is zoomed out'); }
}
For an example of callbacks in use, see example7.html in the Magic 360 zip file.
Parameters
There are 2 ways to change parameters:
1. Apply parameters via the data-options attribute (previous versions of Magic 360 used the rel tag), for example:<a class="Magic360" data-options="filename:ring-{row}-{col}.jpg; columns:32"><img src="ring-01-01.jpg"></a>
2. Or, apply parameters globally (to all spins on the page) with a script tag. For example:<script>
var Magic360Options = {
'speed': '80',
'columns': '18'
};
</script>
Be sure to add commas after all variables, except the last one (or IE will give an error).
| Parameter | Default | Options | Description |
|---|---|---|---|
| Common settings | |||
| filename | e.g. my-image-name-{row}-{col}.jpg | The format of your image file names. Required. | |
| large-filename | e.g. my-bigimage-name-{row}-{col}.jpg | The format of your large image file names. | |
| columns | 36 | numeric | Number of images per row (required unless spin has 36 images). |
| rows | 1 | numeric | Number of images per column (required if more than 1 row). |
| Autospin | |||
| autospin | once | once | twice | infinite | off | Automatically spin the image. |
| autospin-speed | 3600 | numeric | The time (ms) taken to complete 1 rotation. |
| autospin-start | load | load | hover | click | or combination e.g. load,hover | Start autospin on page load, click or hover. |
| autospin-stop | click | click | hover | never | Stop autospin on click, hover or never. |
| autospin-direction | clockwise | clockwise | anticlockwise | alternate-clockwise | alternate-aniticlockwise | Direction of spin. |
| Full-screen & magnifier | |||
| fullscreen | true | true | false | Enable full-screen spin if large images exist. |
| magnify | true | true | false | Enable magnifier if large images exist. |
| magnifier-shape | inner | inner | circle | square | Shape of magnifying glass. |
| magnifier-width | 80% | % of small image width or fixed size in px | Width of magnifying glass (if circle or square). |
| Other settings | |||
| initialize-on | load | load | hover | click | When to download the images. |
| sensitivityX | 50 | 0-100 | Drag sensitivity on X-axis (100 = fast). |
| sensitivityY | 50 | 0-100 | Drag sensitivity on Y-axis (100 = fast). |
| hint | true | true | false | Show hint message & arrows. |
| filepath | e.g. /my/image/location/ | Folder for images. Only needed if different from img src folder. | |
| large-filepath | e.g. /my/image/location/ | Location of large images. Only needed if different from href folder. | |
| start-column | auto | numeric or auto | Start spin with image in src or specify another column. |
| start-row | auto | numeric or auto | Start spin with image in src or specify another row. |
| reverse-column | false | true | false | Reverse rotation on X-axis. |
| reverse-row | false | true | false | Reverse rotation on Y-axis. |
| spin | drag | drag | hover | Method for spinning the image. |
| right-click | false | true | false | Show right-click menu on the image. |
| smoothing | true | true | false | Smoothly stop the image spinning. |
| mousewheel-step | 3 | numeric | Number of frames to spin on mousewheel. |
| column-increment | 1 | numeric | Load only every second (2) or third (3) column so that spins load faster. |
| row-increment | 1 | numeric | Load only every second (2) or third (3) row so that spins load faster. |
| column-digits | numeric | Number of digits used for column numbering. | |
| row-digits | numeric | Number of digits used for row numbering. | |
| column-start-index | 1 | numeric | Starting index of column numbering. |
| row-start-index | 1 | numeric | Starting index of row numbering. |
| loop-column | true | true | false | Continue spin after the last image on X-axis. |
| loop-row | false | true | false | Continue spin after the last image on Y-axis. |
Text settings Magic360Lang
| Parameter | Default | Options | Description |
|---|---|---|---|
| hint-text | Drag to spin | any text | Text shown on image (instructions). |
| mobile-hint-text | Swipe to spin | any text | Text shown on mobile devices (instructions). |