Install in a jiffy. Customize as you wish.
Getting started
If you use one of these platforms, click the icon for quick installation:
If you're not using one of the platforms above, install Magic Scroll like so:
- Download the Magic Scroll demo.
- Unzip the file on your computer and FTP the
magicscrollfolder to your website directory (on your server), keeping the file and folder structure intact. Reference the CSS and JS files before the
</head>of your page. Example:<link rel="stylesheet" href="magicscroll/magicscroll.css"/> <script src="magicscroll/magicscroll.js"></script>
If you cannot access the
headsection of your page, reference the files elsewhere such as the main content of your page.- Go to the settings wizard to choose the settings you would like to use.
- Copy and paste the HTML from the wizard, make any adjustments to the file location of your images, then you're done!
All settings are explained in detail below. If you get stuck, just contact us and we'll help you.
- Download the Magic Scroll demo.
- Unzip the file on your computer and FTP the
magicscrollfolder to your website directory (on your server), keeping the file and folder structure intact. Reference the CSS and JS files before the
</head>of your page. Example:<link rel="stylesheet" href="magicscroll/magicscroll.css"/> <script src="magicscroll/magicscroll.js"></script>
If you cannot access the
headsection of your page, reference the files elsewhere such as the main content of your page.Create a div with a class of
MagicScrolland put whatever you want to scroll inside it. Here is a scroll of 9 images, each linking to a URL:<div class="MagicScroll"> <a href="/page-1/"><img src="example1.jpg"></a> <a href="/page-2/"><img src="example2.jpg"></a> <a href="/page-3/"><img src="example3.jpg"></a> <a href="/page-4/"><img src="example4.jpg"></a> <a href="/page-5/"><img src="example5.jpg"></a> <a href="/page-6/"><img src="example6.jpg"></a> <a href="/page-7/"><img src="example7.jpg"></a> <a href="/page-8/"><img src="example8.jpg"></a> <a href="/page-9/"><img src="example9.jpg"></a> </div>
This is how a basic scroll looks:


To remove the Magic Scroll trial version message, buy Magic Scroll and overwrite the magicscroll.js file with that from your fully licensed version.
Non-commercial sites can apply for a free license.
Rendering mode
Magic Scroll has 4 ways to scroll: scroll, carousel, cover-flow and animation.
Scroll
By default, the scroll mode will be used. Your code will look like this:
<div class="MagicScroll">
    <img src="example1.jpg">
    <img src="example2.jpg">
    ...
</div>
Carousel
A popular elegant effect is carousel which allows visitors to view images in a circular motion. The example below also uses the height setting of 275px:


<div class="MagicScroll" data-options="mode: carousel; height: 275px;">
    <img src="example1.jpg">
    <img src="example2.jpg">
    ...
</div>
Cover Flow
The attractive cover-flow effect (commonly found in some Apple products) can be swiped or easily scrolled with a mousewheel:


<div class="MagicScroll" data-options="mode: cover-flow; height: 275px;">
    <img src="example1.jpg">
    <img src="example2.jpg">
    ...
</div>
Animation
For nice entrance and exit effects set the mode parameter as animation. The slide effect will be applied by default. Add mcs-bounce to the class attribute for a fun bounce effect.
<div class="MagicScroll" data-options="mode: animation;">
    <img src="example1.jpg">
    <img src="example2.jpg">
    ...
</div>
Number of items
The items parameter controls the number of items shown in your carousel. Choose from auto, fit, number and array.
Auto
The default setting is auto. It shows as many items as possible in the scroll area:
<div class="MagicScroll" data-options="width: 640;">
    <img src="example1.jpg">
    <img src="example2.jpg">
    ...
</div>
Fit
Items entirely fit into the view area with the fit option. The example below also scrolls by 1 item:
<div class="MagicScroll" data-options="width: 640; items: fit; step: 1;">
    <img src="example1.jpg">
    <img src="example2.jpg">
    ...
</div>
Number
Choose the exact number of items you want to display with the number setting:
<div class="MagicScroll" data-options="width: 640; items: 3; step: 2;">
    <img src="example1.jpg">
    <img src="example2.jpg">
    ...
</div>
Array
Define the number of visible items depending on width of the scroll view like so:
items: [ [w, i], [w, i], ... ]
where:
w - maximum width of scroll view
i - items to show
<div class="MagicScroll" data-options="items: [[200,1],[400,2],[600,4]]">
    <img src="example1.jpg">
    <img src="example2.jpg">
    ...
</div>
Step
Each time carousel scrolls, it will move by the same number of items on display. Use the step parameter if you want to scroll fewer items, for example:
<div class="MagicScroll" data-options="items: 4; step: 1;">
    <img src="example1.jpg">
    <img src="example2.jpg">
    ...
</div>
Continuous scroll
Set step: 0 for a continuous scroll.
<div class="MagicScroll" data-options="step: 0; speed: 4000;">
    <img src="example1.jpg">
    <img src="example2.jpg">
    ...
</div>
Size
By default Magic Scroll automatically uses 100% of parent's width. To specify a width use the width parameter. You can also change the height of your scroll using the height parameter. Choose your own dimensions in pixels or percentage.
<div class="MagicScroll" data-options="width: 60%; height: 80;">
    <img src="example1.jpg">
    <img src="example2.jpg">
    ...
</div>
Orientation
By default the scroll will move horizontally. Change the direction of the scroll by setting the orientation parameter to vertical. When using the vertical orientation you will also need to define either height or the exact number of items.
<div class="MagicScroll" data-options="orientation: vertical; height: 240;">
    <img src="example1.jpg">
    <img src="example2.jpg">
    ...
</div>

<div class="MagicScroll" data-options="orientation: vertical; items: 3;">
    <img src="example1.jpg">
    <img src="example2.jpg">
    ...
</div>
Autoplay
By default, the autoplay function is disabled (0 milliseconds). This means visitors use the arrows only to scroll through items.
To activate autoplay, set the amount of time the items are stationary. For a 1 second delay, set autoplay: 1000.
<div class="MagicScroll" data-options="autoplay: 1000; step: 1; mode: carousel; height: 275;">
    <img src="example1.jpg">
    <img src="example2.jpg">
    ...
</div>
Speed
The scroll speed is set as 600 milliseconds (0.6 second) by default. Make it slower by increasing the number of milliseconds in the speed parameter.
<div class="MagicScroll" data-options="speed: 2400; autoplay: 1000; items: 4;">
    <img src="example1.jpg">
    <img src="example2.jpg">
    ...
</div>
Easing
You can adjust the acceleration of the scroll with easing setting. Use the cubic-bezier.com to model your own acceleration (bezier curve).
Looping
By default, the scroll will seamlessly continue from the last image to the first image. Alternatively, you can scroll it all the way back to the beginning with the loop: rewind option.
<div class="MagicScroll" data-options="loop: rewind;">
    <img src="example1.jpg">
    <img src="example2.jpg">
    ...
</div>
For the scroll to finish on the last image, set the parameter loop to off.
<div class="MagicScroll" data-options="loop: off;">
    <img src="example1.jpg">
    <img src="example2.jpg">
    ...
</div>
Navigation
You can navigate carousel by arrows, bullets, mouse wheel and keyboard.
Arrows
Arrows appear on the outside of the carousel by default. This can be changed to inside like so:
<div class="MagicScroll" data-options="arrows: inside">
    <img src="example1.jpg">
    <img src="example2.jpg">
    ...
</div>
Disable arrows with arrows: off option.
<div class="MagicScroll" data-options="arrows: off; autoplay: 3000; items: 4;">
    <img src="example1.jpg">
    <img src="example2.jpg">
    ...
</div>
Bullets
To navigate by bullets set the pagination parameter to true. This example shows the arrows have been removed too:
<div class="MagicScroll" data-options="pagination: true; items: 3; mode: animation; arrows: off; loop: off;">
    <img src="example1.jpg">
    <img src="example2.jpg">
    ...
</div>
Mouse wheel
By default, scrolling with the mouse wheel is enabled only in carousel and cover-flow rendering modes. It can be turned on for all modes with scrollOnWheel parameter set to true.
To completely disable scrolling with the mouse wheel use scrollOnWheel: false in the settings.
Keyboard
Set the keyboard option to true to turn on navigation with the ← and → arrow keys.
Video carousel
Adding a video carousel to your website is easy with Magic Scroll. Display YouTube video carousel, Vimeo or self hosted. Our example below uses both YouTube and Vimeo videos:
<div class="MagicScroll">
<div><iframe src="https://player.vimeo.com/video/192130017" alt="" frameborder="0" allowfullscreen></iframe></div>
<div><iframe src="https://www.youtube.com/embed/eCrc_7Z_4xI" alt="" frameborder="0" allowfullscreen></iframe></div>
<div><iframe src="https://player.vimeo.com/video/198821048" alt="" frameborder="0" allowfullscreen></iframe></div>
<div><iframe src="https://www.youtube.com/embed/bB7HsGFHSVk" alt="" frameborder="0" allowfullscreen></iframe></div>
...
</div>
Or create your video carousel using a combination of images and videos:


<div class="MagicScroll">
<div><iframe src="https://player.vimeo.com/video/67394349" alt="" frameborder="0" allowfullscreen></iframe></div>
<div><img src="example1.jpg"></div>
<div><iframe src="https://www.youtube.com/embed/GBVyt16iNiA" alt="" frameborder="0" allowfullscreen></iframe></div>
<div><img src="example2.jpg"></div>
...
</div>
Content
Magic Scroll works with any HTML elements (images, links, text, block elements, etc). Below are some examples.
Images with links and text
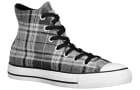
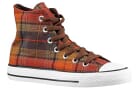
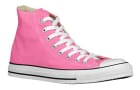
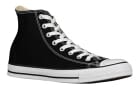
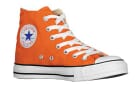
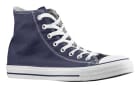
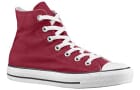
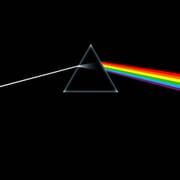
Text and links can be added to any or all images in your carousel. Hover each image to view the text:
<div class="MagicScroll">
    <a href="/page-1/"><img src="example1.jpg">Grey</a>
    <a href="/page-2/"><img src="example2.jpg">Blue</a>
    <a href="/page-3/"><img src="example3.jpg">Red</a>
    <a href="/page-4/"><img src="example4.jpg">Chequered</a>
    <a href="/page-5/"><img src="example5.jpg">Green</a>
    <a href="/page-6/"><img src="example6.jpg">Chestnut</a>
    <a href="/page-7/"><img src="example7.jpg">Pink</a>
    <a href="/page-8/"><img src="example8.jpg">Black</a>
    <a href="/page-9/"><img src="example9.jpg">Orange</a>
</div>
Text with links
The example below scrolls 1 headline of text every 3 seconds (3000 milliseconds). Use additional CSS classes to add your own styling.
<div class="MagicScroll headline" data-options="items: 1; autoplay: 3000; width: 400; height: 60; arrows: off;">
    <span><a href="/buy/magic360/"><b>Magic 360</b></a> - spin products 360 degrees.</span>
    <span><a href="/buy/magiczoomplus/"><b>Magic Zoom Plus</b></a> - hover to zoom, click for expanded view.</span>
    <span><a href="/buy/magicscroll/"><b>Magic Scroll</b></a> - effortlessly scroll through products.</span>
    <span><a href="/buy/magiczoom/"><b>Magic Zoom</b></a> - hover to zoom into your images.</span>
    <span><a href="/buy/magicslideshow/"><b>Magic Slideshow</b></a> - watch a whole series of images.</span>
    <span><a href="/buy/magicthumb/"><b>Magic Thumb</b></a> - enlarge your images to full-screen.</span>
</div>
Combinations
You can use Magic Scroll with our other apps like Magic Zoom Plus, Magic Zoom or Magic Thumb.
First, create your scroll. Then insert a data-zoom-id attribute with a value of the id of the image you want to zoom. This example has 4 images, each with a small, medium and big size:
<div class="MagicScroll">
    <a data-zoom-id="shoes" href="shoe-1-big.jpg" data-image="shoe-1-medium.jpg"><img src="shoe-1-small.jpg"></a>
    <a data-zoom-id="shoes" href="shoe-2-big.jpg" data-image="shoe-2-medium.jpg"><img src="shoe-2-small.jpg"></a>
    <a data-zoom-id="shoes" href="shoe-3-big.jpg" data-image="shoe-3-medium.jpg"><img src="shoe-3-small.jpg"></a>
    <a data-zoom-id="shoes" href="shoe-4-big.jpg" data-image="shoe-4-medium.jpg"><img src="shoe-4-small.jpg"></a>
</div>
<a class="MagicZoomPlus" id="shoes" href="shoe-1-big.jpg"><img src="shoe-1-medium.jpg"></a>
The example above will scroll the 4 small images with Magic Scroll and zoom the medium sized images with Magic Zoom Plus. It is perfect if you have lots of thumbnails of a product and don't want them to take up lots of space on your page. View live demo.
Background
Change the background colour for Carousel and Cover-flow to fit perfectly with your web design.
By default the colour displays as a dark grey background. This can be quickly changed to any colour to fit your web design. Simply add the following code to the bottom of the magicscroll.css file:
Carousel background
.MagicScroll[data-mode="carousel"] {
    background-color: <your-colour>;
}
Cover-flow background
.MagicScroll[data-mode="cover-flow"] {
    background-color: <your-colour>;
}
Styling
Magic Scroll offers several predefined styles that can be used out of the box.
Rounded Arrows
Apply rounded arrows with a background to the carousel by adding mcs-rounded to the classattribute.
<div class="MagicScroll mcs-rounded" data-options="arrows: outside; items: fit;">
    <img src="example1.jpg">
    <img src="example2.jpg">
    ...
</div>
Borders
To add a border around items in your scroll add mcs-border to the classattribute:
<div class="MagicScroll mcs-border">
    <img src="example1.jpg">
    <img src="example2.jpg">
    ...
</div>
Lazy loading
You can configure the carousel to load images on demand (lazy loading). Set the lazyLoad parameter to true and use data-src attribute to specify the URL of the image instead of the src. Example:
<div class="MagicScroll" data-options="lazyLoad: true;">
    <img data-src="example1.jpg">
    <img data-src="example2.jpg">
    ...
</div>
Autostart
Magic Scroll starts automatically when page is loaded by default. To start it manually set autostart parameter to false.
API & callbacks
API Methods
You can use the Magic Scroll API methods to scroll your items dynamically:
MagicScroll.start(#id)- start scroller by #id. Without parameters, start all scrollers on the page.MagicScroll.stop(#id)- stop scroller by #id. Without parameters, stop all scrollers on the page.MagicScroll.refresh(#id)- reload scroller by #id. Without parameters, reload all scrollers on the page.MagicScroll.running(#id)- check whether scroller is running on HTML element with a particular #id.MagicScroll.updateOptions(#id, options)- update scroller options.MagicScroll.play(#id, speed)- start autoplay with a certain speed in milliseconds on a scroller.MagicScroll.pause(#id)- stop autoplay on a scroller.MagicScroll.forward(#id, step)- scroll forward.MagicScroll.backward(#id, step)- scroll backward.MagicScroll.jump(#id, index)- scroll to item with a certain index.MagicScroll.addItem(#id, node, index)- add new item node (DOM element or HTML code) after item with certain index (or to the end if index is not specified).MagicScroll.removeItem(#id, index)- remove item with certain index.MagicScroll.getItem(#id, index)- retrieve item with certain index.MagicScroll.getItems(#id)- retrieve all items.
Callbacks
| Callback | Arguments | Description |
|---|---|---|
| onReady | scroller #id | Fires after scroller is started and ready to operate. |
| onStop | scroller #id | Fires after scroller is stopped. |
| onItemHover | {scroller #id, item index} | Fires when mouse is moved over the item. |
| onItemOut | {scroller #id, item index} | Fires when mouse is moved off the item. |
| onMoveStart | {scroller #id, array of indexes of items to be shown} | Fires before scrolling starts. |
| onMoveEnd | {scroller #id, array of visible items indexes} | Fires after scrolling ends. |
Example of usage:
<script>
    var MagicScrollOptions = {};
    MagicScrollOptions = {
        onReady: function () {
            console.log('onReady', arguments[0]);
        },
        onStop: function () {
            console.log('onStop', arguments[0]);
        },
        onItemHover: function () {
            console.log('onItemHover', arguments[0]);
        },
        onItemOut: function () {
            console.log('onItemOut', arguments[0]);
        },
        onMoveStart: function () {
            console.log('onMoveStart', arguments[0]);
        },
        onMoveEnd: function () {
            console.log('onMoveEnd', arguments[0]);
        }
    };
</script>
Parameters
16 parameters are listed below for customizing Magic Scroll. Each parameter can be applied via the data-options attribute, for example:
<div class="MagicScroll" data-options="speed: 2000; arrows: inside; loop: rewind">
    <img src="example1.jpg">
    <img src="example2.jpg">
    <img src="example3.jpg">
</div>
Or parameters may be set globally with the MagicScrollOptions variable, e.g.:
<script>
    MagicScrollOptions = {
        speed: 2000,
        arrows: 'inside',
        loop: 'rewind'
    }
</script>
For mobile devices (smartphones in particular), global parameters can be overwritten either with the MagicScrollMobileOptions variable:
<script>
var MagicScrollMobileOptions = {
  orientation:'horizontal'
};
</script>
or locally via the data-mobile-options attribute:
<div class="MagicScroll" data-options="orientation:vertical" data-mobile-options="orientation:horizontal">
    <img src="example1.jpg">
    <img src="example2.jpg">
    <img src="example3.jpg">
</div>
| Parameter | Default | Options | Description |
|---|---|---|---|
| mode | scroll | scroll | carousel | cover-flow | animation | Choice of scroll effects |
| width | auto | auto | <pixels> | <percentage> | Width of entire scroll area |
| height | auto | auto | <pixels> | <percentage> | Height of entire scroll area |
| orientation | horizontal | horizontal | vertical | Direction of scroll |
| items | auto | auto | fit | numeric | array | Number of items to show. You can preset the number of visible items depending on the width of scroll view. Format: [ [x,y], [x,y], ... ] x - maximum scroll width y - items to display. Example: [ [600,2], [800,3], [1000,5], [1200,7], [1500,10] ] |
| speed | 600 | <milliseconds> | Scroll speed |
| autoplay | 0 | <milliseconds> | Time between each scroll. 0 = disable autoplay. |
| loop | infinite | infinite | rewind | off | Scroll in loop, rewind to the first item after the last or stop at the last item. |
| step | auto | auto | numeric | Number of items moved on each scroll |
| arrows | outside | outside | inside | off | Show arrows inside, outside or hidden |
| pagination | false | true | false | Show pagination (bullets) |
| easing | cubic-bezier(.8, 0, .5, 1) | CSS3 Animation Easing. See cubic-bezier.com | |
| scrollOnWheel | auto | auto | true | false | auto - automatically turn off scrolling on mouse wheel in the scroll and animation modes, and enable it in carousel and cover-flow modes. |
| lazyLoad | false | true | false | Delay image loading. Images outside of view will be loaded on demand |
| autostart | true | true | false | Whether to start Magic Scroll automatically on page load or manually |
| keyboard | false | true | false | Enable / disable keyboard navigation |