extensions
Wonderful Weebly image viewers
Weebly is a great service for building a free website, quickly. However, a professional feeling requires more than the standard Weebly tools. That's where our sleek image tools come in.
These 5 top-rated Weebly image viewers will zoom your images and create image slideshows and carousels. Try all 5 below and pick your favourite image tools for your Weebly site.
     | |
Magic Zoom Plus for Weebly
Experiment with a free trial before you buy
- Browse products fast and naturally on mobile and desktop.
- Reliable - beautifully coded, clean HTML and JavaScript.
- All latest versions
98% of shoppers say its their favourite zoom
Responsive
Fast loading
SEO friendly
Supports video
Easy to customise
Switchable thumbnails
Friendly support
One-off payment
jQuery compatible
Regularly updated
Lazy loading
Optimised for mobile
- Download Magic Zoom Plus (free and fully functional demo version).
- Unzip the contents of the zip file.
 Login to Weebly, go to your Theme tab, select your theme and click Edit HTML/CSS.
 Next, create 2 new folders. Click the '+' sign next to 'Assets' > Select 'New Folder > Name new folder 'magiczoomplus'.
Highlight new 'magiczoomplus' folder > Click 'Settings icon > Select 'New Folder' > Name new folder 'fonts'.
Now your folders are created, upload the following files from your Magic Zoom Plus unzipped folder to the corresponding folder on Weebly:
- magiczoomplus/magiczoomplus.css
- magiczoomplus/magiczoomplus.js
- magiczoomplus/fonts/magictoolbox-thin.eot
- magiczoomplus/fonts/magictoolbox-thin.svg
- magiczoomplus/fonts/magictoolbox-thin.ttf
- magiczoomplus/fonts/magictoolbox-thin.woff
- Click Add new files again (next to 'Assets') and now upload the images you wish to zoom. (Upload a small image and a large image). Click Save.

Go to the Pages tab > click the page where you want to add Magic Zoom Plus > click SEO Settings and in the Header code field, paste this code:
<link rel="stylesheet" href="/files/theme/magiczoomplus/magiczoomplus.css">
<script src="/files/theme/magiczoomplus/magiczoomplus.js"></script>
- Go to the Pages tab, where you want to add Magic Zoom Plus, then click Build (Edit Page).
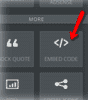 Drag the Custom HTML element into your page and paste this code:
<a href="/files/theme/YOUR-BIG-IMAGE.jpg" class="MagicZoom"><img src="/files/theme/YOUR-SMALL-IMAGE.jpg"></a>
(replacing YOUR-BIG-IMAGE and YOUR-SMALL-IMAGE with the names of the images that you uploaded).
- Magic Zoom Plus should now be working! Customize Magic Zoom Plus as you wish using the HTML settings here.
- Buy Magic Zoom Plus To upgrade your free and fully functional trial version of Magic Zoom Plus (which removes the "Trial version" text), buy Magic Zoom Plus or get a free Magic Zoom Plus license (for non-commercial sites such as personal blogs and charities). Then overwrite the demo magiczoomplus.js file with the one from your licensed version.


Useful Tips
- Repeat Steps 8, 9 & 10 for each page where you want to add Magic Zoom Plus.
- Images won't show while you are creating your zoom - to see them you must Publish your page to see the live site.
- Once installed, you can change the size, colors and effects, as described in the customization options.
Thanks for trying Magic Zoom Plus on your Weebly site! What did you hope Magic Zoom Plus could do? How can we improve it? Let us know, we're always improving our tools based on customer feedback.
- Login to Weebly, go to the Pages tab, click the page where you want to remove Magic Zoom Plus.
Delete the Custom HTML element in your page which contains code:
<a href="/files/theme/YOUR-BIG-IMAGE.jpg" class="MagicZoom"><img src="/files/theme/YOUR-SMALL-IMAGE.jpg"></a>
Go to the Pages tab, click the page where Magic Zoom Plus is to be removed, click SEO Settings and in the Header code field, delete this code:
<link rel="stylesheet" href="/files/theme/magiczoomplus/magiczoomplus.css">
<script src="/files/theme/magiczoomplus/magiczoomplus.js"></script>
- Go to your Theme tab and click Edit HTML/CSS.
- Go to 'Assets' > Delete 'magiczoomplus' folder (and its sub-folders).
- Magic Zoom Plus is now uninstalled.

Magic Zoom Plus for Weebly
    | |
Magic Zoom for Weebly
Blend it in perfectly with your site design
- Instantly make your products look more trustworthy.
- Solve the problem of showing beautiful big images within a small space.
- All latest versions
93% of users say it boosted their sales
Responsive
Fast loading
SEO friendly
Supports video
Easy to customise
Switchable thumbnails
Friendly support
One-off payment
Regularly updated
jQuery compatible
On-demand loading
Optimised for mobile
- Download Magic Zoom (free and fully functional demo version).
- Unzip the contents of the zip file.
- Login to Weebly, go to your Theme tab, select your theme and click Edit HTML/CSS.
- Next, create 2 new folders. Click the '+' sign next to 'Assets' > Select 'New Folder > Name new folder 'magiczoom'.
Highlight new 'magiczoom' folder > Click 'Settings icon > Select 'New Folder' > Name new folder 'fonts'.
Now your folders are created, upload the following files from your Magic Zoom unzipped folder to the corresponding folder on Weebly:
- magiczoom/magiczoom.css
- magiczoom/magiczoom.js
- magiczoom/fonts/magictoolbox-thin.eot
- magiczoom/fonts/magictoolbox-thin.svg
- magiczoom/fonts/magictoolbox-thin.ttf
- magiczoom/fonts/magictoolbox-thin.woff
- Click Add new files again (next to 'Assets') and now upload the images you wish to zoom. (Upload a small image and a large image). Click Save.
Go to the Pages tab > click the page where you want to add Magic Zoom > click SEO Settings and in the Header code field, paste this code:
<link rel="stylesheet" href="/files/theme/magiczoom/magiczoom.css">
<script src="/files/theme/magiczoom/magiczoom.js"></script>
- Go to the Pages tab, where you want to add Magic Zoom, then click Build (Edit Page).
- Drag the Custom HTML element into your page and paste this code:
<a href="/files/theme/YOUR-BIG-IMAGE.jpg" class="MagicZoom"><img src="/files/theme/YOUR-SMALL-IMAGE.jpg"></a>
(replacing YOUR-BIG-IMAGE and YOUR-SMALL-IMAGE with the names of the images that you uploaded).
- Magic Zoom should now be working! Customize Magic Zoom as you wish using the HTML settings here.
- Buy Magic Zoom To upgrade your free and fully functional trial version of Magic Zoom (which removes the "Trial version" text), buy Magic Zoom or get a free Magic Zoom license (for non-commercial sites such as personal blogs and charities). Then overwrite the demo magiczoom.js file with the one from your licensed version.
Useful Tips
- Repeat Steps 8, 9 & 10 for each page where you want to add Magic Zoom.
- Images won't show while you are creating your zoom - to see them you must Publish your page to see the live site.
- Once installed, you can change the size, colors and effects, as described in the customization options.
Thanks for trying Magic Zoom on your Weebly site! What did you hope Magic Zoom could do? How can we improve it? Let us know, we're always improving our tools based on customer feedback.
- Login to Weebly, go to the Pages tab, click the page where you want to remove Magic Zoom.
Delete the Custom HTML element in your page which contains code:
<a href="/files/theme/YOUR-BIG-IMAGE.jpg" class="MagicZoom"><img src="/files/theme/YOUR-SMALL-IMAGE.jpg"></a>
Go to the Pages tab, click the page where Magic Zoom is to be removed, click SEO Settings and in the Header code field, delete this code:
<link rel="stylesheet" href="/files/theme/magiczoom/magiczoom.css">
<script src="/files/theme/magiczoom/magiczoom.js"></script>
- Go to your Theme tab and click Edit HTML/CSS.
- Go to 'Assets' > Delete 'magiczoom' folder (and its sub-folders).
- Magic Zoom is now uninstalled.
Magic Zoom for Weebly
 Zara 2014
 Zara 2014
 Zara 2014
 Zara 2014
 Zara 2014
 Zara 2014
 Zara 2014
 Zara 2014
 Zara 2015
 Zara 2015
 Zara 2015
 Zara 2015
 Zara 2015
 Zara 2015
 Zara 2015
 Zara 2015
 Zara 2015
 Zara 2015
Magic Scroll for Weebly
The world's leading image zoom
- Enable your visitors to inspect products as if holding them in their hands
- Choose your effect: cover-flow, 3D carousel, animation or classic image scroll.
- All latest versions
91% of shoppers prefer it to static images
Scrollable images, HTML or videos
Combine with other Magic viewers
Highly customisable
All kinds of uses
jQuery compatible
Regularly updated
One-time payment
Responsive
- Download Magic Scroll (free and fully functional demo version).
- Unzip the contents of the zip file.
- Login to Weebly, go to your Theme tab, select your theme and click Edit HTML/CSS.
- Next, create a new folder. Click the '+' sign next to 'Assets' > Select 'New Folder > Name new folder 'magicscroll'.
Upload the following files from your Magic Scroll unzipped folder to the 'magicscroll' folder on Weebly:
- magicscroll/magicscroll.css
- magicscroll/magicscroll.js
- Click the '+' next to 'Assets' again and now upload the images you wish to use for your carousel. Click Save.
Go to the Pages tab > click the page where you want to add Magic Scroll > click SEO Settings and in the Header code field, paste this code:
<link rel="stylesheet" href="/files/theme/magicscroll/magicscroll.css">
<script src="/files/theme/magicscroll/magicscroll.js"></script>
- Go to the Pages tab, where you want to add Magic Scroll, then click Build (Edit Page).
- Drag the Custom HTML element into your page and paste this code:
 <div class="MagicScroll">
  <a href="/page-1/"><img src="/files/theme/example1.jpg"></a>
  <a href="/page-2/"><img src="/files/theme/example2.jpg"></a>
  <a href="/page-3/"><img src="/files/theme/example3.jpg"></a>
  <a href="/page-4/"><img src="/files/theme/example4.jpg"></a>
  <a href="/page-5/"><img src="/files/theme/example5.jpg"></a>
  <a href="/page-6/"><img src="/files/theme/example6.jpg"></a>
 </div>
(replacing example1, example2, example3, example4, example5, example6 with the names of the images that you uploaded). Link each image to the page of your choice).
- Magic Scroll should now be working! Customize Magic Scroll as you wish using the HTML settings here.
To spread the carousel images add the setting data-options="items: 4; step: 1;" and choose the numbers for items and step to the <div> tag:
<div class="MagicScroll" data-options="items: 4; step: 1;">
- Buy Magic Scroll To upgrade your free and fully functional trial version of Magic Scroll (which removes the "Trial version" text), buy Magic Scroll or get a free Magic Scroll license (for non-commercial sites such as personal blogs and charities). Then overwrite the demo magicscroll.js file with the one from your licensed version.
Useful Tips
- Repeat Steps 7, 8 & 9 for each page where you want to add Magic Scroll.
- Images won't show while you are creating your carousel - to see them you must Publish your page to see the live site.
- Once installed, you can change the size, colors and effects, as described in the customization options.
Thanks for trying Magic Scroll on your Weebly site! What did you hope Magic Scroll could do? How can we improve it? Let us know, we're always improving our tools based on customer feedback.
- Login to Weebly, go to the Pages tab, click the page where you want to remove Magic Scroll.
Delete the Custom HTML element in your page which contains code:
 <div class="MagicScroll">
  <a href="/page-1/"><img src="/files/theme/example1.jpg"></a>
  <a href="/page-2/"><img src="/files/theme/example2.jpg"></a>
  <a href="/page-3/"><img src="/files/theme/example3.jpg"></a>
  <a href="/page-4/"><img src="/files/theme/example4.jpg"></a>
  <a href="/page-5/"><img src="/files/theme/example5.jpg"></a>
  <a href="/page-6/"><img src="/files/theme/example6.jpg"></a>
 </div>
Go to the Pages tab, click the page where Magic Scroll is to be removed, click SEO Settings and in the Header code field, delete this code:
<link rel="stylesheet" href="/files/theme/magicscroll/magicscroll.css">
<script src="/files/theme/magicscroll/magicscroll.js"></script>
- Go to your Theme tab and click Edit HTML/CSS.
- Go to 'Assets' > Delete 'magicscroll' folder (and its sub-folders).
- Magic Scroll is now uninstalled.
FAQ
Can I change background colour of carousel?
Yes! By default, the Carousel & Cover-Flow modes use a grey/black background colour. You can change the Hex Colour to anything you want. With over 16,000 hex colours available, you'll be spoilt for choice. Simply add the CSS code you need to the Magic Scroll CSS file.
Carousel background
.MagicScroll[data-mode="carousel"] {
    background-color: <your-colour>;
}
Cover-flow background
.MagicScroll[data-mode="cover-flow"] {
    background-color: <your-colour>;
}
Magic Scroll for Weebly


Magic Slideshow for Weebly
Make your website stand out
- Choose from 10 gorgeous effects.
- Looks fabulous on mobiles & desktops alike.
- All latest versions
88% say it brings the home page to life
9 popular effects
Image thumbnails
Easy to customise
Clickable bullets
Fast loading
Responsive
Pure JavaScript & CSS
jQuery compatible
Regularly updated
One-off payment
SEO friendly
- Download Magic Slideshow (free and fully functional demo version).
- Unzip the contents of the zip file.
- Login to Weebly, go to your Theme tab, select your theme and click Edit HTML/CSS.
- Next, create a new folder. Click the '+' sign next to 'Assets' > Select 'New Folder > Name new folder 'magicslideshow'.
Upload the following files from your Magic Slideshow unzipped folder to the 'magicslideshow' folder on Weebly:
- magicslideshow/magicslideshow.css
- magicslideshow/magicslideshow.js
- Click the '+' next to 'Assets' again and now upload the images you wish to use for your slideshow. Click Save.
Go to the Pages tab > click the page where you want to add Magic Slideshow > click SEO Settings and in the Header code field, paste this code:
<link rel="stylesheet" href="/files/theme/magicslideshow/magicslideshow.css">
<script src="/files/theme/magicslideshow/magicslideshow.js"></script>
- Go to the Pages tab, where you want to add Magic Slideshow, then click Build (Edit Page).
- Drag the Custom HTML element into your page and paste this code:
 <div class="MagicSlideshow">
  <img src="/files/theme/example1.jpg">
  <img src="/files/theme/example2.jpg">
  <img src="/files/theme/example3.jpg">
 </div>
(replacing example1, example2, example3 with the names of the images that you uploaded).
- Magic Slideshow should now be working! Customize Magic Slideshow as you wish using the HTML settings here.
- Buy Magic Slideshow To upgrade your free and fully functional trial version of Magic Slideshow (which removes the "Trial version" text), buy Magic Slideshow or get a free Magic Slideshow license (for non-commercial sites such as personal blogs and charities). Then overwrite the demo magicslideshow.js file with the one from your licensed version.
Useful Tips
- Repeat Steps 7, 8 & 9 for each page where you want to add Magic Slideshow.
- Images won't show while you are creating your slideshow - to see them you must Publish your page to see the live site.
- Once installed, you can change the size, colors and effects, as described in the customization options.
Thanks for trying Magic Slideshow on your Weebly site! What did you hope Magic Slideshow could do? How can we improve it? Let us know, we're always improving our tools based on customer feedback.
- Login to Weebly, go to the Pages tab, click the page where you want to remove Magic Slideshow.
Delete the Custom HTML element in your page which contains code:
 <div class="MagicSlideshow">
  <img src="/files/theme/example1.jpg">
  <img src="/files/theme/example2.jpg">
  <img src="/files/theme/example3.jpg">
 </div>
Go to the Pages tab, click the page where Magic Slideshow is to be removed, click SEO Settings and in the Header code field, delete this code:
<link rel="stylesheet" href="/files/theme/magicslideshow/magicslideshow.css">
<script src="/files/theme/magicslideshow/magicslideshow.js"></script>
- Go to your Theme tab and click Edit HTML/CSS.
- Go to 'Assets' > Delete 'magicslideshow' folder (and its sub-folders).
- Magic Slideshow is now uninstalled.
Magic Slideshow for Weebly
    | |
Magic Thumb for Weebly
Position enlarged images anywhere on the web page
- Enlarged images can link to URLs, show text, titles, even forms and buttons.
- Touch gestures for a smooth mobile experience.
- All latest versions
92% of users say its the best image lightbox
Responsive
Fast loading
SEO friendly
Lazy loading
Supports video
Friendly support
One-off payment
Regularly updated
jQuery compatible
Swappable thumbnails
- Download Magic Thumb (free and fully functional demo version).
- Unzip the contents of the zip file. Go to the magicthumb folder. Edit the CSS file magicthumb.css. Delete the graphics/ reference.
- Login to Weebly, go to your Theme tab, select your theme and click Edit HTML/CSS.
- Next, create 2 new folders. Click the '+' sign next to 'Assets' > Select 'New Folder > Name new folder 'magicthumb'.
Highlight new 'magicthumb' folder > Click 'Settings icon > Select 'New Folder' > Name new folder 'graphics'.
Now your folders are created, upload the following files from your Magic Thumb unzipped folder to the corresponding folder on Weebly:
- magicthumb/magicthumb.css
- magicthumb/magicthumb.js
- magicthumb/graphics/loader.gif
- magicthumb/graphics/buttons1.png
- magicthumb/graphics/zoomin.cur
- magicthumb/graphics/zoomout.cur
- Click Add new files again (next to 'Assets') and now upload the images you wish to zoom. (Upload a small image and a large image). Click Save.
Go to the Pages tab > click the page where you want to add Magic Thumb > click SEO Settings and in the Header code field, paste this code:
<link rel="stylesheet" href="/files/theme/magicthumb/magicthumb.css">
<script src="/files/theme/magicthumb/magicthumb.js"></script>
- Go to the Pages tab, where you want to add Magic Thumb, then click Build (Edit Page).
- Drag the Custom HTML element into your page and paste this code:
<a href="/files/theme/YOUR-BIG-IMAGE.jpg" class="MagicThumb"><img src="/files/theme/YOUR-SMALL-IMAGE.jpg"></a>
(replacing YOUR-BIG-IMAGE and YOUR-SMALL-IMAGE with the names of the images that you uploaded).
- Magic Thumb should now be working! Customize Magic Thumb as you wish using the HTML settings here.
- Buy Magic Thumb To upgrade your free and fully functional trial version of Magic Thumb (which removes the "Trial version" text), buy Magic Thumb or get a free Magic Thumb license (for non-commercial sites such as personal blogs and charities). Then overwrite the demo magicthumb.js file with the one from your licensed version.
Useful Tips
- Repeat Steps 8, 9 & 10 for each page where you want to add Magic Thumb.
- Images won't show while you are creating your zoom - to see them you must Publish your page to see the live site.
- Once installed, you can change the size, colors and effects, as described in the customization options.
Thanks for trying Magic Thumb on your Weebly site! What did you hope Magic Thumb could do? How can we improve it? Let us know, we're always improving our tools based on customer feedback.
- Login to Weebly, go to the Pages tab, click the page where you want to remove Magic Thumb.
Delete the Custom HTML element in your page which contains code:
<a href="/files/theme/YOUR-BIG-IMAGE.jpg" class="MagicThumb"><img src="/files/theme/YOUR-SMALL-IMAGE.jpg"></a>
Go to the Pages tab, click the page where Magic Thumb is to be removed, click SEO Settings and in the Header code field, delete this code:
<link rel="stylesheet" href="/files/theme/magicthumb/magicthumb.css">
<script src="/files/theme/magicthumb/magicthumb.js"></script>
- Go to your Theme tab and click Edit HTML/CSS.
- Go to 'Assets' > Delete 'magicthumb' folder (and its sub-folders).
- Magic Thumb is now uninstalled.
Magic Thumb for Weebly
About
These instructions are for Weebly. Use them to add effects to your website including image zoom on hover/mouseover; image lightbox (enlarge image to full screen); image slideshows in JavaScript; image carousels; and image magnifiers.